Express by eMabler simplifies and accelerates the payment process at EV charging stations, allowing immediate transactions via credit cards and mobile payment solutions. This feature is designed to integrate seamlessly with your existing EV charging infrastructure.
Key Features
-
Direct Payment Processing
-
Supports credit cards, Apple Pay, Google Pay, and other mobile payment options.
-
-
Cost-effective Setup
-
Minimal setup and operational expenses, ideal for businesses expanding payment options.
-
Benefits of Express
-
User Convenience: Easy and quick payments through familiar methods.
-
Rapid Deployment: Quick and straightforward integration.
-
Accessibility: Enhance customer experience with simplified, hassle-free payments.
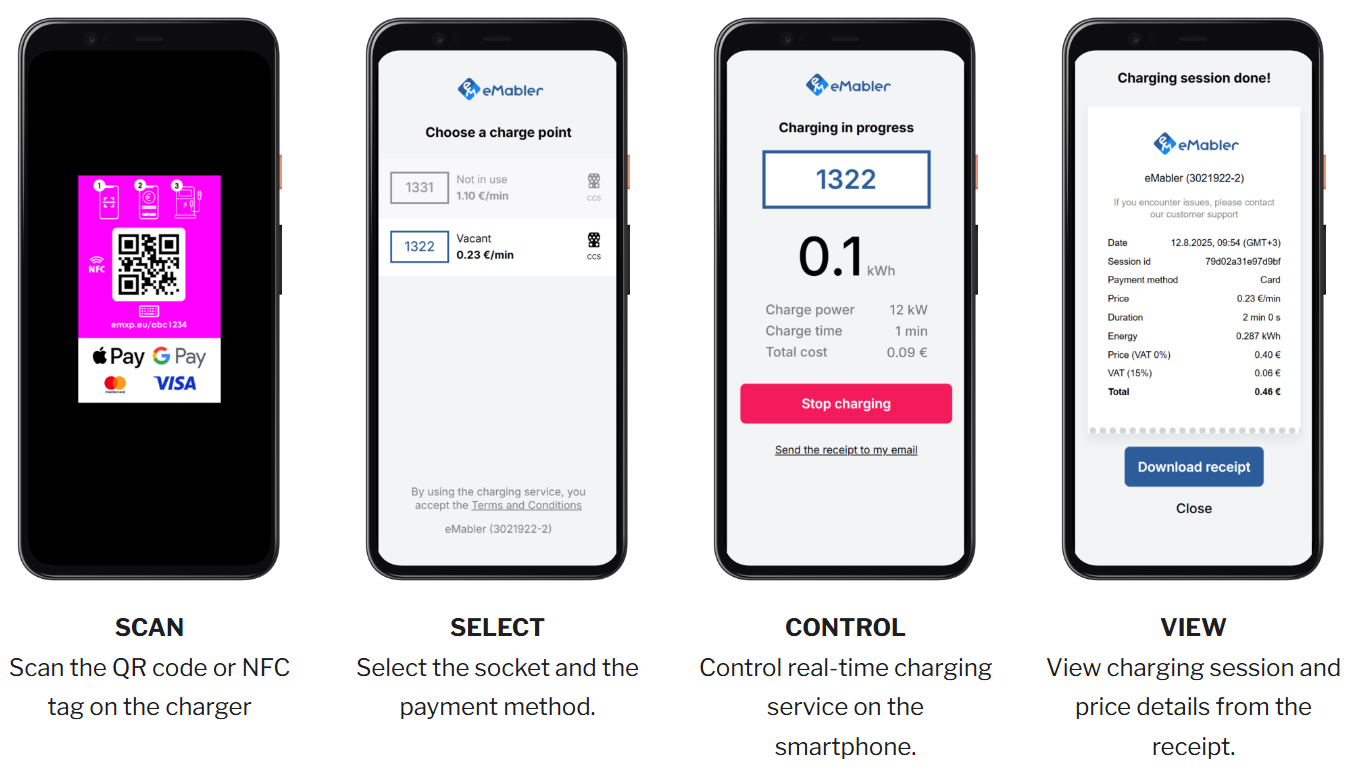
Express Payment Process
-
SCAN: Scan the QR code or NFC tag on the charger.
-
SELECT: Choose your socket and preferred payment method.
-
CONTROL: Control your charging session directly from your smartphone.
-
VIEW: Instantly view charging details and access digital receipts.
Setting Up Express
Merchant Account Setup
-
Contact eMabler Customer Success Manager or Support team to initiate account creation with Adyen Payment Service Provider.
-
Provide the contact details of the person who will complete the onboarding on behalf of your company. This person must be authorized to sign on behalf of the business.
-
Full name of the authorised signatory (exactly as it appears on their government-issued ID)
-
Business email address of the signatory (the Adyen invitation will be sent here)
-
Mobile phone number of the signatory (used for SMS verification during onboarding)
-
Job title of the signatory (e.g. CEO, CFO, Managing Director)
-
Customer support phone number (this number might be shown on drivers bank statements for some payment methods)
-
-
Read the Onboarding Guide and prepare the documents requested.
Designing QR/NFC Stickers and Configuring URLs
-
Order QR/NFC stickers for application on chargers.
-
eMabler can assist with designing and producing stickers.
-
Define and configure the Express URL.
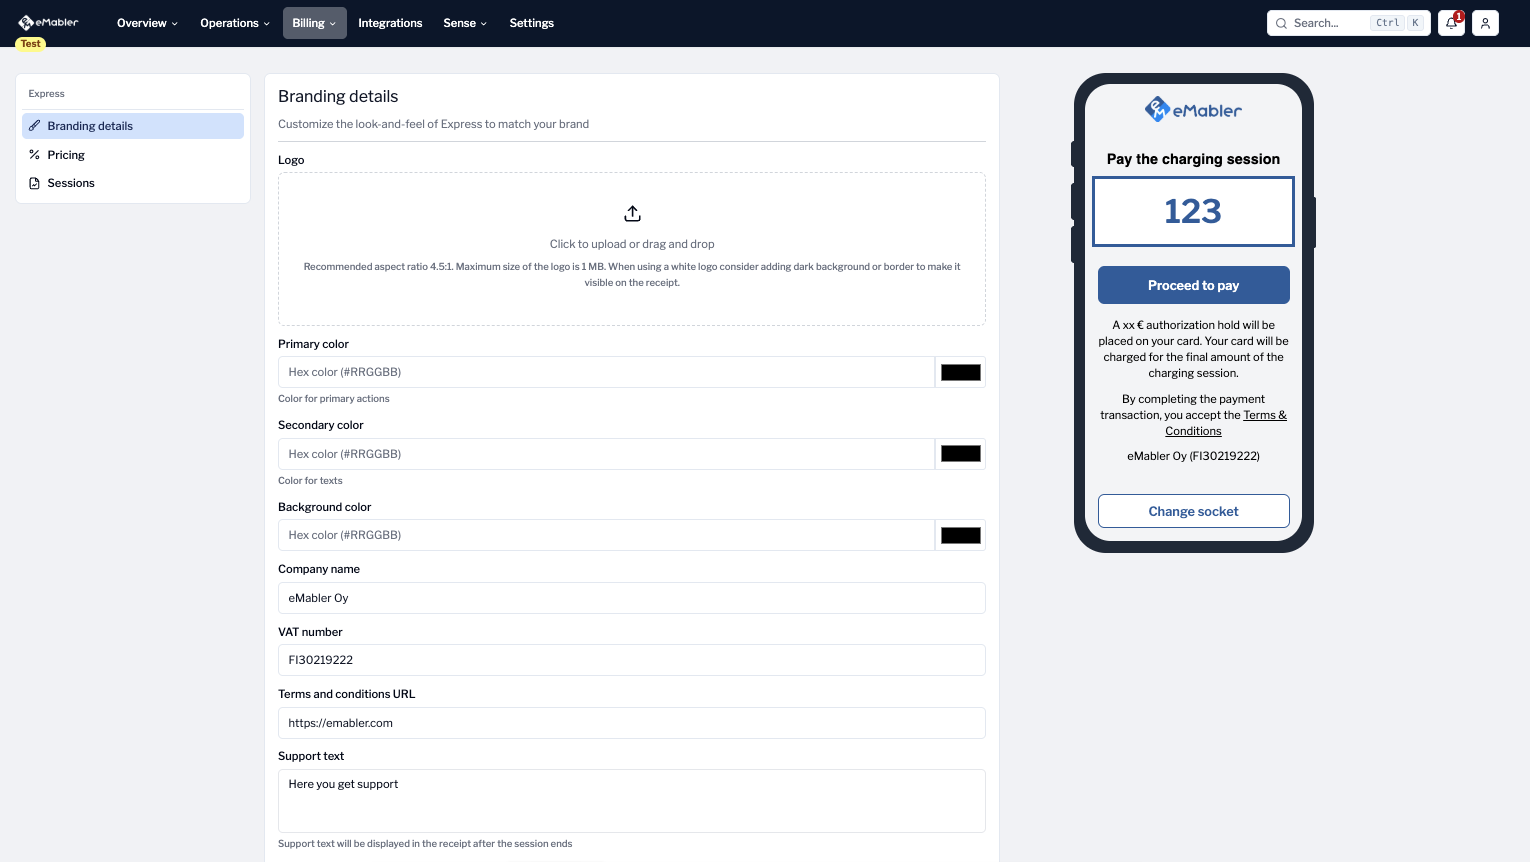
Updating Branding Details
Found under: Billing → Express → Branding details
This module allows operators to customize the look and feel of the eMabler Express payment portal:
|
Field |
Description |
|---|---|
|
Logo |
Upload a company logo (SVG preferred, max 1MB). Recommended aspect ratio is 4.5:1. |
|
Primary Color |
Hex code for buttons and interactive elements (e.g. |
|
Secondary Color |
Text color (e.g. |
|
Background Color |
Sets the background tone of the Express interface (e.g. |
|
Company Name |
Appears on payment screens and receipts (e.g. |
|
VAT Number |
Shown to the user for invoicing/legal clarity (e.g. |
|
Terms & Conditions URL |
Links to your business’ legal terms (e.g. |
|
Support Text |
Optional field for helpdesk info (not visible in the screenshot). |
Preview: Right-side mockup shows how branding choices reflect on the mobile interface. Includes price, payment button, T&Cs, and a socket switch option.
Pricing Configuration
Found under: Billing → Express → Pricing
This section lets operators define unit-based prices used in Express charging sessions:
|
Field |
Description |
|---|---|
|
Unit Price |
Set a price including tax (e.g. |
|
Price Type |
Choose from |
|
Tax % |
Tax included in the unit price (e.g. 25%, 0%). |
|
Currency |
Supported options: EUR, SEK, NOK, etc. |
Supports flexible tax rules and currency localization per market.
All prices in this section are displayed including tax to simplify end-user understanding.
Session Monitoring
Found under: Billing → Express → Sessions
This screen displays a detailed session log for Express transactions.
A "View" link per row allows drill-down into session details (e.g. energy used, cost details).

Charger Configuration
-
Navigate to the charger configuration page and click Express.
-
Input the Express URL to match your QR/NFC stickers.
-
Set or create socket-specific pricing:
-
Currency: EUR
-
Choose pricing model: per kWh or per minute.
-
Specify price and tax.
-
-
Save your changes to apply the configuration.
Testing Payment Flows
-
Select a charger socket.
-
Connect the charger to a vehicle.
-
Click Proceed to pay.
-
For testing purposes, use virtual payment details (production requires real payment info).
-
Authorize and start the payment.
-
Opt-in to receive a receipt via email.
-
End the session by clicking Stop charging.
-
Review the session receipt, then close.
Your chargers are now configured and ready for Express payments, ensuring a seamless and convenient EV charging experience for your customers!