
Spot optimization pauses charging when the hourly electricity price is high, so a site charges mostly in the cheap hours without you scheduling anything. It runs on top of Dynamic Load Management (DLM) — fuse protection always comes first, price optimization second.
What it is
Connect fetches day-ahead spot prices for the bidding zone you set on a DLM site. Because prices differ wildly between zones and currencies, Connect does not compare raw prices. It normalizes each hour to a value between 0 (very cheap for that zone) and 1 (very expensive for that zone), using the 10th and 90th percentile of the day as the bottom and top of the range:
NormalizedPrice = ((SpotPrice - MinPrice) / (MaxPrice - MinPrice))^2
-
MinPrice — 10th percentile of the day's prices in the bidding zone
-
MaxPrice — 90th percentile of the day's prices in the bidding zone
Connect recalculates this every evening for the following day, for every bidding zone in use. The normalized value drives three price bands:
|
Band |
Normalized value |
|---|---|
|
High price |
above 0.75 |
|
Elevated price |
above 0.50 |
|
Moderate price |
above 0.25 |
The same bands mean the same thing in Finland and in the Netherlands, in EUR or in SEK. A cheap hour in one zone is a cheap hour in the other.
When you use it
-
Cut energy costs at workplace and apartment sites where cars sit plugged in far longer than they need to charge
-
Shift charging away from the morning and evening price peaks without writing a schedule
-
Give drivers at a residential site control over their own cost-versus-speed trade-off
-
Keep a fleet or service charger on.
-
Always charge while everything else on the site optimizes
Spot optimization does not move load to a specific hour. It pauses charging during expensive hours and lets DLM distribute current normally during the rest.
How it works with DLM
DLM runs in two phases on every profile update:
-
Fuse protection. DLM allocates current so the site stays under its effective max current. This runs first and is never overridden by price.
-
Spot optimization. For each charger, Connect reads the charger's mode and the current normalized price. If the price is above the mode's threshold, Connect sends a 0 A profile and the charger pauses. Otherwise, the charger keeps the profile fuse protection decided.
Current freed by a paused charger is reallocated to the chargers that are still charging. When Connect pauses a charger, it also calculates when the price next drops below the threshold, and resumes the charger at that time. An hourly batch job re-checks chargers whose resume time has passed and redistributes profiles.
A charger with no mode set defaults to Always charge — nothing changes until you opt a charger in.
Charging modes
Set the mode per charger under Chargers → [charger] → Energy management.
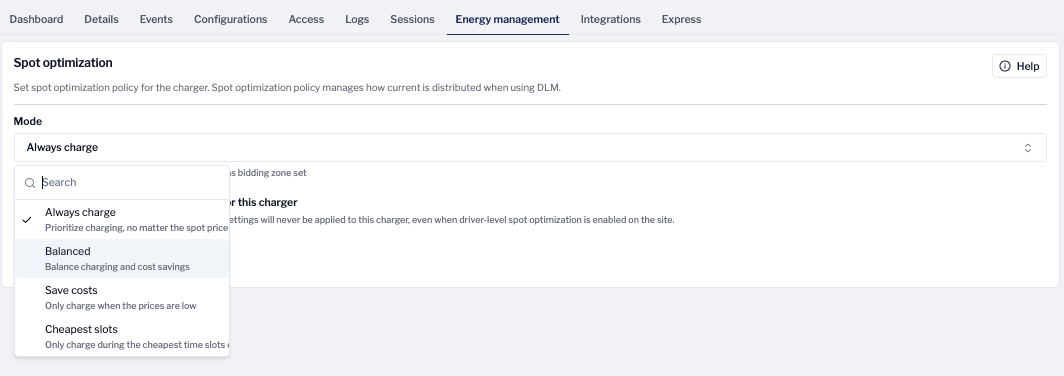
The Mode list on a charger's Energy management tab.
|
Mode |
Behaviour |
Pauses above |
|---|---|---|
|
Always charge |
Prioritize charging, no matter the spot price |
never |
|
Balanced |
Balance charging and cost savings — stops only on price peaks, charges in most hours |
High price (0.75) |
|
Save costs |
Only charge when the prices are low — stops during High and Elevated price |
Elevated price (0.50) |
|
Cheapest slots |
Only charge during the cheapest time slots of the day |
|
Enable spot optimization on a site
By the end, chargers on the site pause during expensive hours according to the mode set on each one.
Before you start
-
DLM is enabled on the site — spot optimization is a DLM function and does nothing without it
-
You know the bidding zone the site belongs to
-
You have permission to edit DLM settings in Connect
Steps
-
Open the site's DLM settings. Go to Site → DLM → Settings, then the Spot optimization tab.
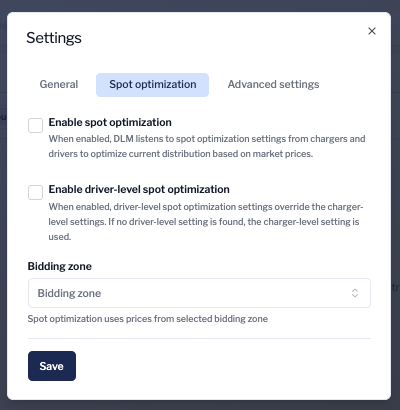
All three site-level controls live on one tab.
-
Select the Bidding zone. Spot optimization uses prices from this zone. Without a bidding zone, charger modes have no effect.
-
Tick Enable spot optimization. DLM now listens to the spot optimization settings from chargers and drivers.
-
Tick Enable driver-level spot optimization if you want drivers to choose their own mode. Driver settings then override the charger setting. Where no driver setting exists, the charger setting applies.
-
Click Save.
-
Set the mode on each charger. Go to Chargers → [charger] → Energy management, pick a Mode, and click Save. Chargers you leave alone stay on Always charge.
What you'll see when it works
The site DLM header shows Spot optimization as enabled with the bidding zone next to it. During a high-price hour, a charger on Save costs drops to a 0 A profile and its session pauses; the Capacity chart shows that current allocated to other chargers instead.

Let drivers choose their own mode
When Enable driver-level spot optimization is on for the site, drivers set their own preference in the driver app and it overrides the charger's mode.
-
Show the control in the driver app. Go to Settings → Driver app settings and tick Spot optimization enabled. The driver app then shows the Smart charging section to drivers.
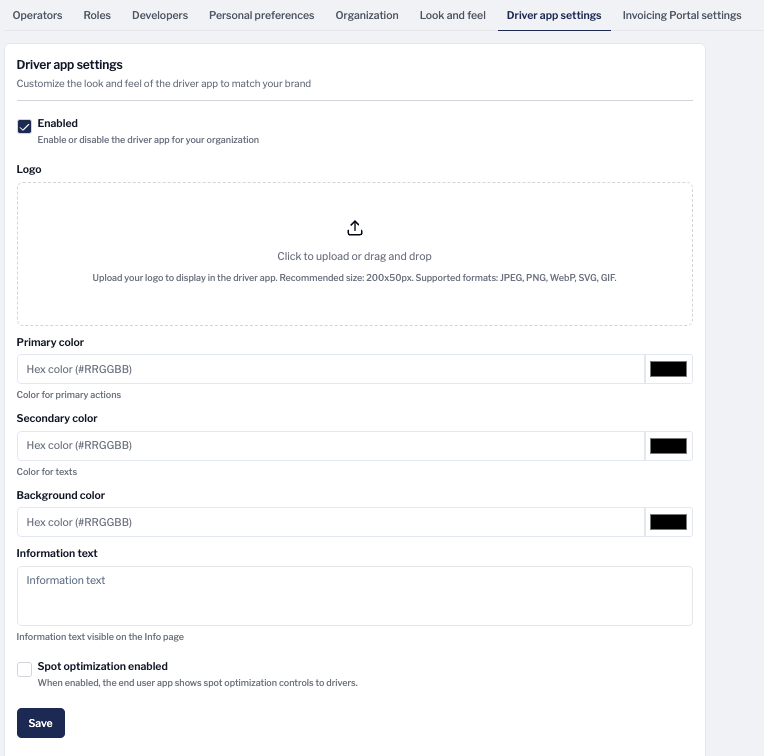
Spot optimization enabled sits at the bottom of the driver app settings. Until it is ticked, drivers never see the Smart charging controls.
-
The driver picks a mode. In the driver app, under Settings → Smart charging:
-
Charge anytime — charge any time the cable is plugged in
-
Skip expensive hours — pause during the most expensive periods
-
Cheapest hours only — only charge when electricity is at its cheapest
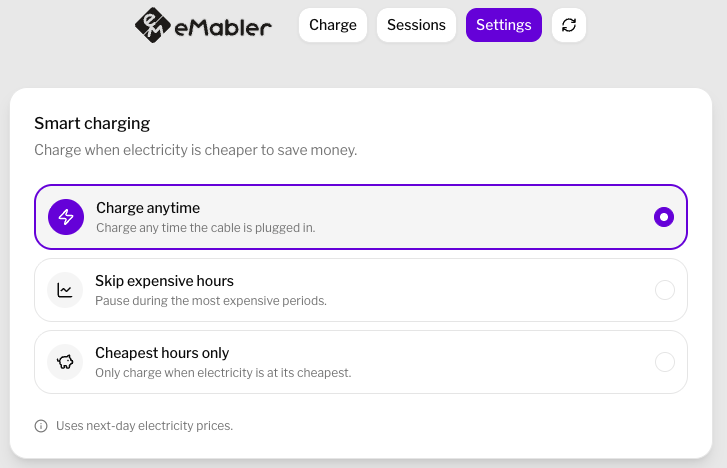
The driver app uses next-day electricity prices for these modes.
-
Exclude specific chargers if needed. On a charger you want to keep under operator control — a fleet bay, a service charger — go to Chargers → [charger] → Energy management and tick Disable driver-level spot optimization for this charger. Driver settings are never applied to that charger, even with driver-level optimization on for the site.
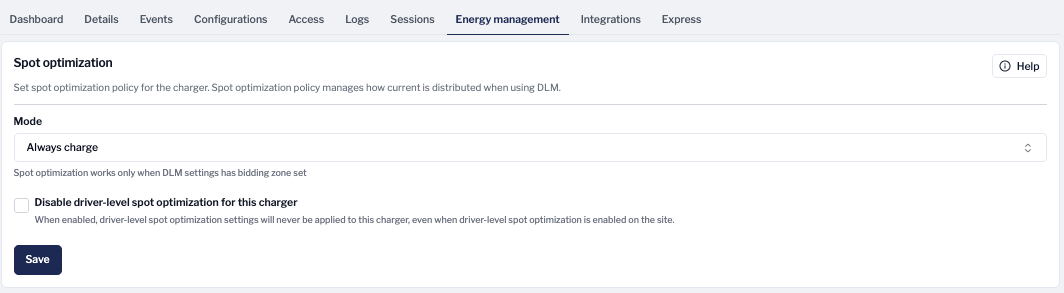
The charger's Energy management tab holds both the Mode and the driver-level override. The helper text is a real constraint: without a bidding zone on the DLM site, the mode does nothing.
Which setting wins
|
Situation |
Mode applied |
|---|---|
|
Driver-level off for the site |
Charger mode |
|
Driver-level on, driver has set a mode |
Driver mode |
|
Driver-level on, driver has set nothing |
Charger mode |
|
Charger has Disable driver-level spot optimization ticked |
Charger mode, always |